
")
")
")
- The functionality of the flight plan generator for the Parrot Anafi drone is discussed here: Flight plan for Parrot Anafi online. Register on the forum and join the discussion.
- You can create flight plans without registering on the site, but in this case you will not be able to use all the features. After registration, you can save flight plans and use the saved data to create new plans. Watch this video!
-
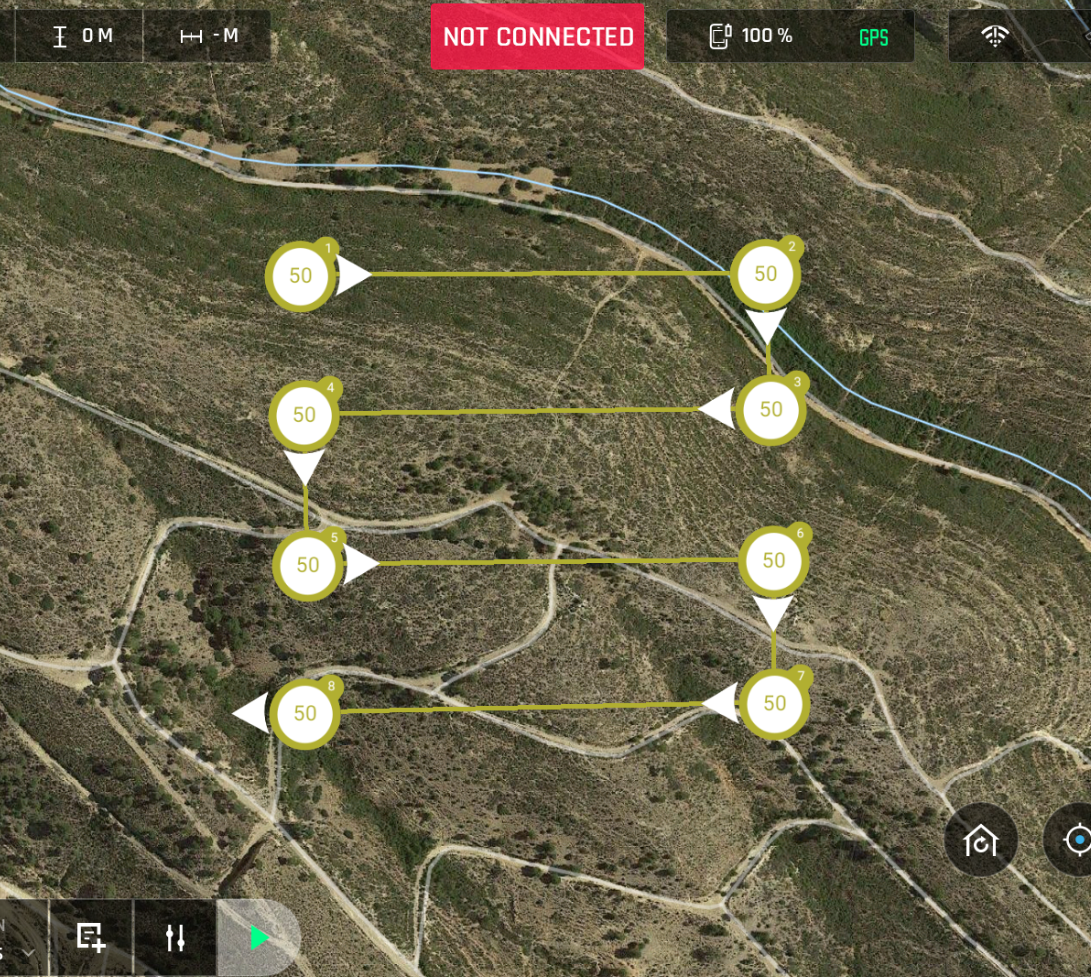
How to create a simple flight plan.
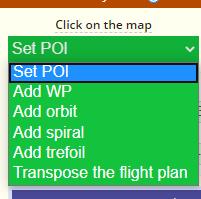
- Put the POI marker in the desired position, assign a name to it, and specify its height. The POI height (like all other heights) is measured relative to the take-off point. When you set the height of the POI, then you specify a certain point in space that the drone's camera will look at in the following mode (when "Follow POI"=yes).
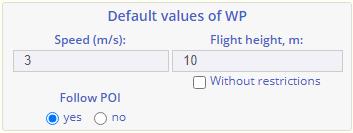
- In the "Click on the map" field, select "Add WP" and click in the appropriate place on the map. New WP files are created with the parameters specified in these fields:
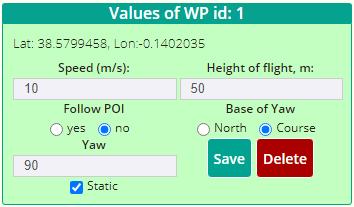
If you set "Follow POI" =no, two new fields will be shown: "Base of Yaw" and "Yaw". The "Base of Yaw" is the direction relative to which Yaw is set - relative to the direction to the North or relative to the direction of movement of the drone ("Course"). If you want your drone to look in the same direction during flight, choose the North orientation. And don't forget that Yaw is always measured counterclockwise.
As you know, by default, FreeFlight 6 creates a flight plan with the "Constant course" option disabled. This means that if two neighboring points have different Yaw, the drone will rotate smoothly throughout the entire segment when moving from point to point. For example:
When "Static Yaw" is activated, the rotation angle will remain unchanged as you move from point to point. This can be useful when performing various tasks, such as surveying or mapping.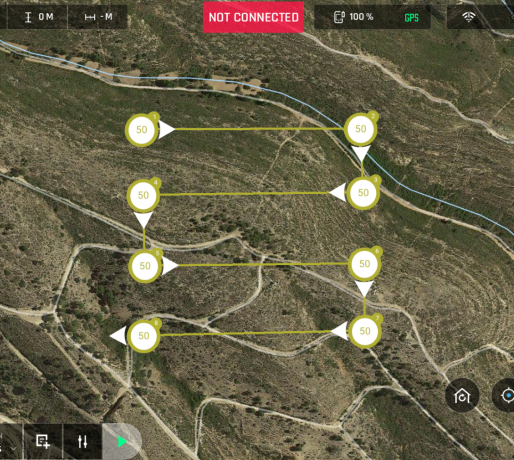
- To view or change the WP parameters or to delete a WP click the WP marker. The marker color will change to red, and the parameters of the selected point will be displayed in the window "Values of WP". The window title shows the point ID.
- You can rotate the flight plan by the angle and direction specified in this line:

- The button at the bottom (
 ) inverts the execution of the flight plan. The first point becomes the last. The first point of the plan is always blue.
 - Clicking on the "Save" button, strange as it may seem, saves the flight plan. Clicking on the "Create files" button performs two operations: saving the flight plan and generating a ZIP archive with the flight plan files for use on your mobile device. If you use an Android device, unpack the archive to the "sdcard/Free Flight 6 /flightPlan" folder. If you use iOS unzip the archive to "FreeFlight6/.Contents/FlightPlan". After unpacking the archive, a new flight plan will appear in FreeFlight 6 (watch the first video on this page).
- Also the archive contains the file "log.txt" width information about the flight plan in an easy-to-read format. It is recommended for use when analyzing the captured video material.
-
The use of primitives
- You can automatically create simple trajectories (primitives) in the form of orbits, spirals, and trefoil-shaped flight paths. To create a primitive, select the appropriate item in the "Click on the map" field.
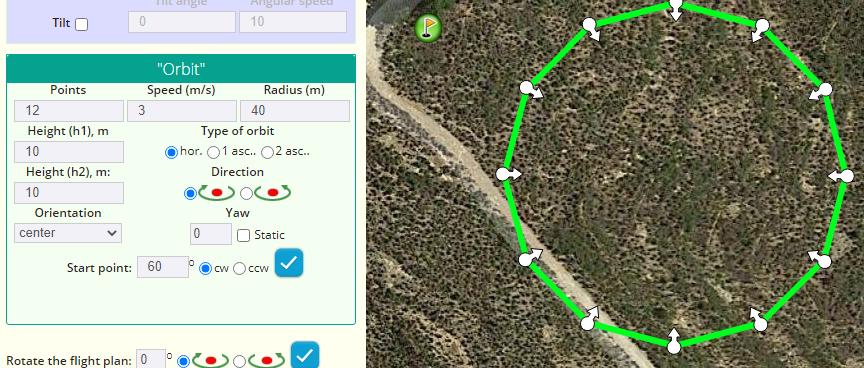
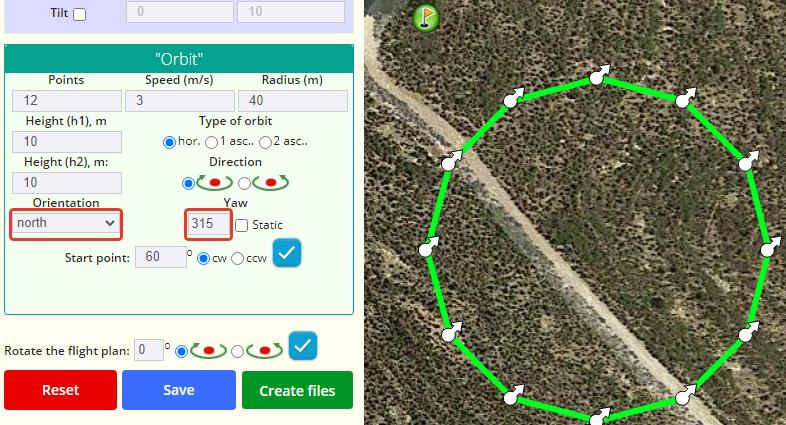
- For the orbit, you need to specify the radius, altitude, speed, direction, type and orientation of the drone in flight.
- Type of orbit:
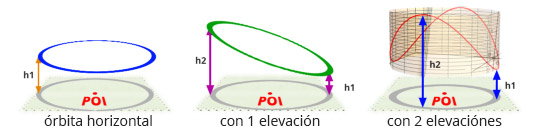
- Orientation:
- POI. The drone looks at the POI wherever it is.
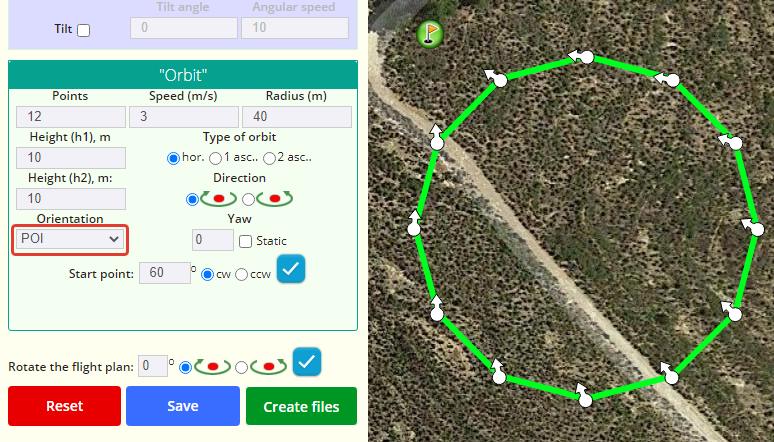
- Center. The drone looks at the center of the orbit:
- North - respectively. Don't forget that Yaw is always measured counterclockwise.
- Course. There are opportunities for interesting options here. For example:
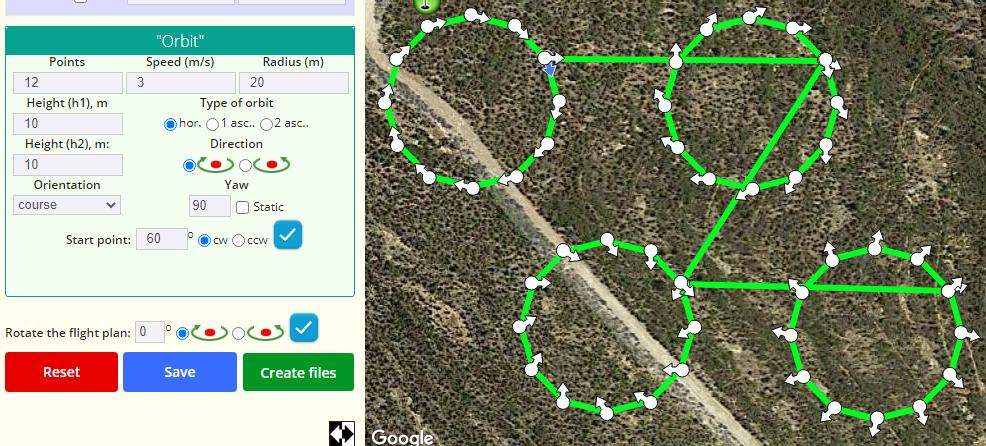
- POI. The drone looks at the POI wherever it is.
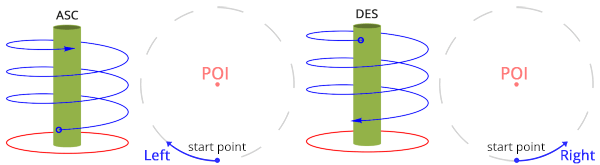
- Types of spiral:
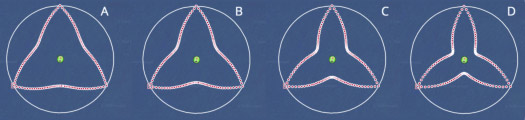
- Types of "trefoil":
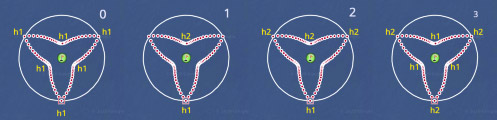
- For the trefoil you can also specify the number of ascents when moving along the trajectory:
- These primitives are not created immediately. The first click on the map creates a "draft" so that you can select the correct radius and starting point. To select the starting point, you specify the angle in degrees measured relative to the direction to the North. You can also specify which way from the North.
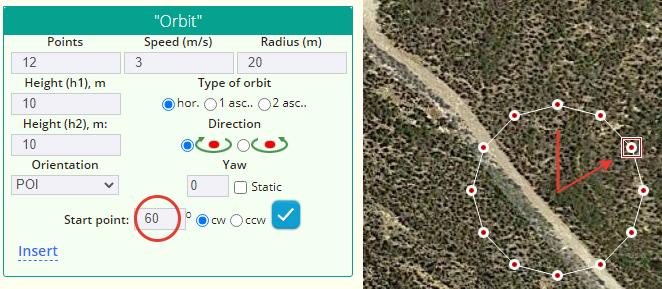
- After selecting the parameters, click "Insert".
- You can automatically create simple trajectories (primitives) in the form of orbits, spirals, and trefoil-shaped flight paths. To create a primitive, select the appropriate item in the "Click on the map" field.
-
"Takeoff" fields
- These are the parameters with which the drone starts executing the flight plan.

- These are the parameters with which the drone starts executing the flight plan.
-
Actions
- You can add actions for each point of the flight plan.
Click on WP to select it for editing (a second click cancels the selection).
Use this button to add actions to a point.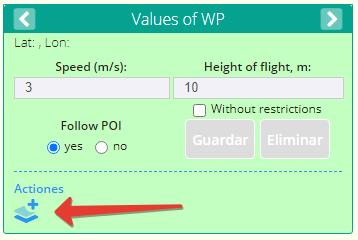
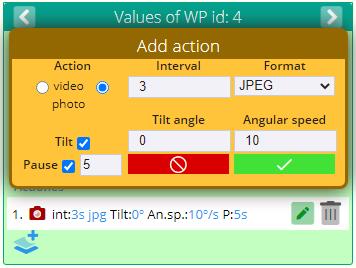
- You only need to add an action if you want to change the previously set mode. If you set "video" in the "Takeoff" fields and do not plan to do anything other than video, then you do not need to add an action, and the entire flight of the drone will shoot video. The added action is performed until a new action is added.
For example, in "Takeoff" you have set "video", then a 5th point WP you've added an action Photo, and a 10th WP added the action "video" again. Your drone will shoot video from the moment of takeoff to the 5th point. Then from the 5th point to the 10th point it will take a photo, and at the 10th point it will switch back to video mode. - You can add multiple actions to each point, just like in FF6. Added actions are displayed as a text string. You can delete and edit added actions.
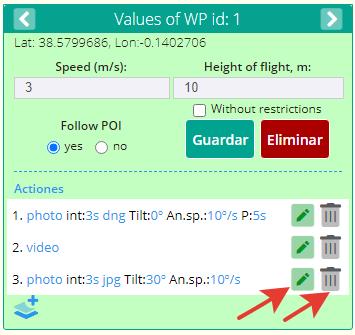
- You can add actions for each point of the flight plan.
-
How to use the created flight plan.
- After clicking "Create files", a window with download links will appear.
- Download the version that matches your operating system.
- Android
- Move the downloaded file to the folder "/sdcard/FreeFlight 6/flightPlan/" of the device that you connect to SC3 to control the drone. - iOS
- Move the downloaded file to the folder "FreeFlight6/.Contents/FlightPlan" of the device that you connect to SC3 to control the drone. If you have problems accessing this folder, read this. - Unpack the archive. If while unpacking, you will be prompted to create a new directory, then do not. The archive already contains the necessary directory.
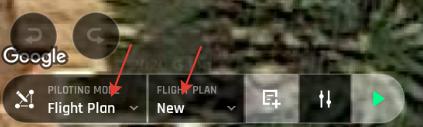
- Go to (open) the FreeFlight 6 program.
- Change the piloting mode to "Flight Plan".
- Click the "Flight Plan" button and select the downloaded plan.
- Remember that before starting a flight, you must check all the parameters of the plan: the position of the points, the height and speed at each point. Make sure that there are no objects in the flight zone that can become an obstacle.
Помощь
Help me develop the project
If my flight plans help you achieve your goals or save you time, you can support the author.
Thank you for your donations. As of 29.05.26 19:39:14 455,09€ was recieved as donations.
4796 flight plans were created.